Showing posts with label Little One's Bedroom. Show all posts

Monday, June 11, 2018

Strawberry Shortcaked

Everyone went to the pool which means I get to stay home and enjoy some quiet time/work on projects...clean everyone's messes...
It was past time to clean and freshen #1's bed so I decided to switch it up a bit while she was out and not here to share her opinion. I know once I did it she would be fine with it and she was. So Hello Kitty took a break and my Strawberry Shortcake blanket went to work.


The blanket was mine from as long as I can remember.


The pillow and blanket I got in the box from the estate sale a few months ago, mentioned here.

Which reminds me, I did get the train hung in #2's room.


and apparently I cannot get this off of my phone as a rectangle so you can see the whole train and shelf and I definitely can't take a real photo in here with my camera at 11 o'clock at night so there you have it!

If I had truly been motivated I would have dug around my basement to find more strawberry pillows and stuffies but I'm sure they will migrate upstairs on their own eventually

Tuesday, July 14, 2015

Free Friday Floating Toy Shelves


 This is what the living room typically looks like. (though we were trying to weed out the 1980's Little People this day) The little things can be tossed into the boxes and bins but what about those awkward buildings etc.? They stayed on the floor. 

I've had it in the back of my mind to add shelves to this area of Lucca's room but I didn't know how and it wasn't a priority:
(note MORE big awkward toys)

Our salvage store has a free day on the first Friday of the month for random things they haven't been able to sell. Needless to say I am a frequent attendee. When my mom is in town with the van? Lets just say it is not wise to let us go by ourselves. 

 Last month they had a huge stack of these doors. My mom said "oh, these doors make nice shelves. Too bad your dad made me get rid of mine." Wait, shelves? I could use shelves. So I selected a set which wasn't too scratched up while she went on about how if she still had hers she could have given them to me blah, blah blah. Reminder these were free so I'm not sure why she felt bad about getting rid of her set of door shelves! 

I took off the hardware and they were an inch too long so I cut them down. I was originally planning on carefully filling the holes and painting the shelves but decided to let go of my OCD ways and just hang them up. I also originally was going to use the adjustable metal brackets but there is a little bit of trim on the corner of the closet door so they were then a 1/4 of an inch too wide. 

There is that closet door trim which ruined my plan! 

I had an hour before I had to get to work so what was I going to do to get this done!? For some odd reason I had these short pieces which brackets fit into and viola! they fit behind the trim and seem to give the boards enough support. 

The finish color even somehow freakishly matches my woodwork color so it's a good thing I didn't paint them. I thought I wanted them to be adjustable but I like the clean floating look better so it all worked out perfectly. Her toys are lightweight so they don't need much support in the middle and if she decides to swing from it, or something weird, the shelf probably will fall but she will be showered with toys and a 3 pound shelf instead of something solid wood or particle board. We shall see! It keeps a few awkward things off the floor/at least I have an easy place to stuff them when I need to vacuum.


Thursday, March 27, 2014

A Woodland Wall Collage, Sort Of

Something happened to my blog, meaning my background is disappearing and reappearing at random! Meh, I should do some custom cool background like everyone else does but for the moment it is going to be weird

I am always sending my mom random real estate listings so we can discuss them and I have been finding more and more my description reading "Pinterest exploded all over this house" to listings you can tell were updated and staged. I am willing to admit the only reason I can recognize this is I spend too much time browsing Pinterest and Pinterest has finally exploded onto my small child's wall. NO I didn't paint it gray and add yellow chevrons...though maybe...nope! Fortunately I have no painted woodwork in the house so I can't even be tempted by this trend.

See, probably not as bad as you were thinking. The top dresser drawer didn't even get closed, though I did move the gross diaper pail which usually hangs out in the corner.

I was going to give the clock an orange background but then it ended up by the butterfly so I'll have to figure out something different for it. The orange flowers kind of work.

I've been wanting to hang up the cute embroidery which I...made (ha ha, j/k) I picked up for $3.99 at a thrift store in Denver last year. Then I came across the owl needlepoint from my grandma's stash - which I suspect she also picked up at a garage sale. I now had a theme. It fit the rest of little one's room theme but the other items I wanted to include in the collage? gallery wall?, a bright pink print and game board map, clashed with this theme so I had to dig up more stuff! I probably have something hidden away in a closet which I have forgotten about but what fun is that!?

We were at the Goodwill Wearhouse in Omaha which sells things by the pound. It is fascinating, disgusting and a fun treasure hunt all a the same time. Not for a weak thrifter, that is for sure! I wouldn't recommend buying a pillow or 15 pound inflatable mattress (which I saw 3 of) but I always find crazy things for the wall. I did paint the butterfly to match the dresser pulls as it was just white before.
The fabric in the hoops are scraps from the cut down curtains. Ohh,look at me being all matchy, matchy with things!

Thursday, January 23, 2014

It Took 18 months...

It took 18 months but I finally finished the curtains in little one's room!
My downfall was I had gotten tired of looking at the blank, white shades and hung them, without finishing them.

Whew, all shortened and functioning. It's nice not to think about having to fix them every time I walk in the room!

Tuesday, February 12, 2013

Camera Lurkers #1 - Vintage Chair Reupholstered

I'm horrible with follow through of my projects here on the blog plus last year was hit and miss with my postings anyways. Last summer I posted a story about a chair which I bought to reupholster. Did I ever reupholster said chair?? Yes! Yes, I did actually and the photos have been floating around waiting to land on a post for how many months now?

This was the chair last summer which I wrote about here

and here it is finished!
I had been wanting to try my hand at some reupholstering but the only project I had was my grandparent's couch and I didn't want to start with that! 

The first step was to kick off the cat.

 (don't worry Cammie. You can have the gross fabric when I'm done)
 
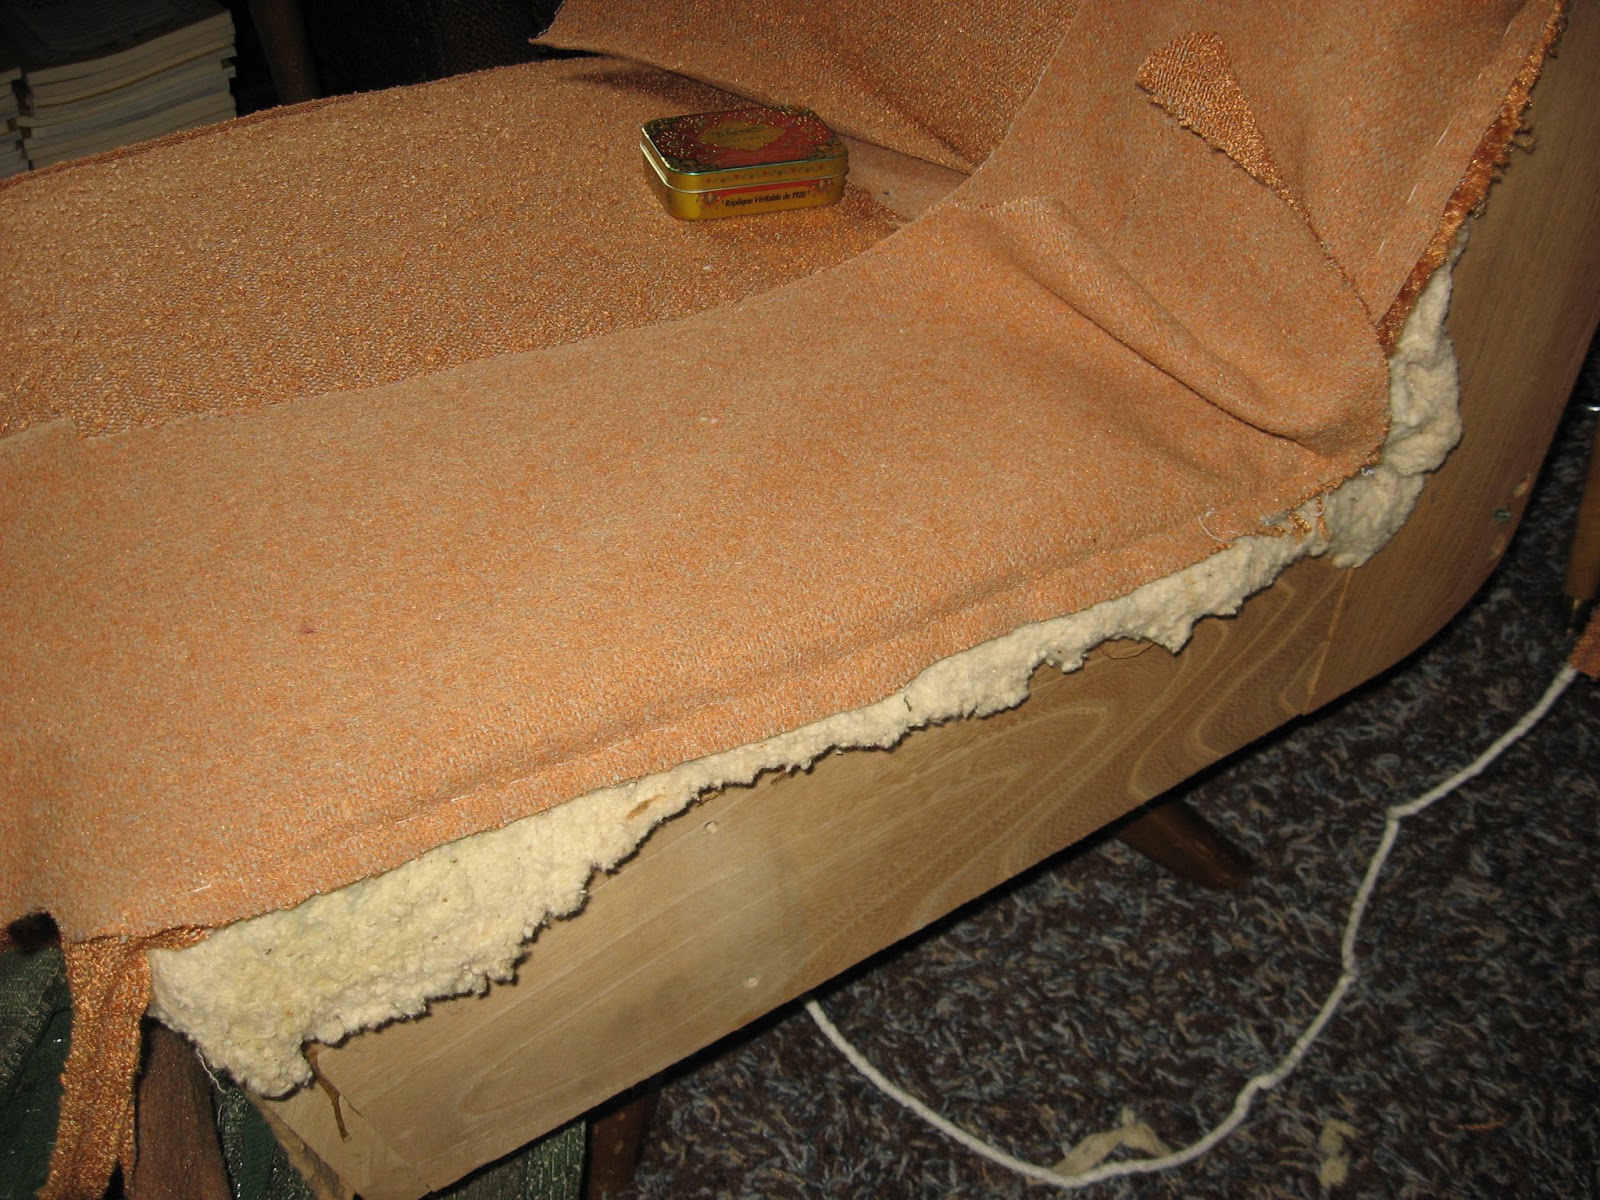
Since I had never done this before I started out by carefully photographing the various seams and folds as I took off the old fabric.

 After the old fabric was off, I used it as a pattern for the new fabric.
 (after taking this picture I realized the 2 top side pieces should be sideways. The fabric needs to run the same direction on all of the pieces!)

I started with the piping first since that looked easy. And it was. Joann's had the blank white cord and I just used the quilting foot (which is super skinny) to sew my matching fabric as close to that cord as possible. 

I was nervous about the seat and back but with some pinning and basting it was easier than I expected. Of course with the piping and 2 pieces of upholstery fabric it was too thick to do on my machine so I had to sew it all by hand. Meh, I was 8 months pregnant. What else was I going to be doing? 

When this was all done it formed a kind of slip cover over the chair. 

To make sure the side pieces were extra tight I stitched them after a few of the staples were in place. 

The staples were fun as I could really start to see the finished product and it was actually looking nice!

Oh Cammie. You're doing it wrong. Silly Kitty. 

The buttons were next. How was I going to manage those? I measured and guessed and measured some more and amazingly it worked!

I just covered over the old buttons with some new fabric. They have metal tabs on the back which fold out so I popped them into my marked locations and opened the tab back up. 

Hmm, it appears I did not take any open photos of the back of the chair so here is one with the old upholstery.
(You can see were the metal tabs are for the buttons too)

Once I was to this point I had to figure out how to get the final piece of fabric attached. 
They were a little bent but fortunately I saved the original nail strips for the sides and fortunately the fabric easily attached. I pulled it tight and nailed it in place. The top I stitched in place and the bottom stapled to the underside. 
I'm sure I didn't do it the easiest way and probably not the official correct way. (If there is a correct way to reupholster a piece of vintage furniture?) I did surprise myself and it came out looking almost professional. 

Now if I could get my curtains made! Yeah, I know but the tension went out on my sewing machine. This has happened before and it usually somehow fixes itself if I don't use it for a few months (don't ask why or how!) so it is about time I try to use it again. At least there are shades but the curtains explain my chosen green and orange color scheme. 

and a side note - my 1930's Mickey Mouse tea set and table will be leaving the room as soon as someone becomes mobile! A safe place will be found which sadly might be my closet again for a while.


Thursday, August 30, 2012

Free Changing Table/Dresser Makeover

The before shot of my inherited? saved from the dumpster? changing table/chest. It sat in my grandparent's basement forever, always with the guest sheets and misc. linens inside. My dad doesn't even remember where it came from as he said it was always sitting at their old house too. We were hoping someone else saw potential in it but $10 at the estate sale didn't sell it and none of us could stand to leave it in the house for the house flipper so my parents took it. It then ended up in my garage as I had mentioned maybe I could use it as a changing table. It was antiqued in the 70's and obviously needed fresh paint.
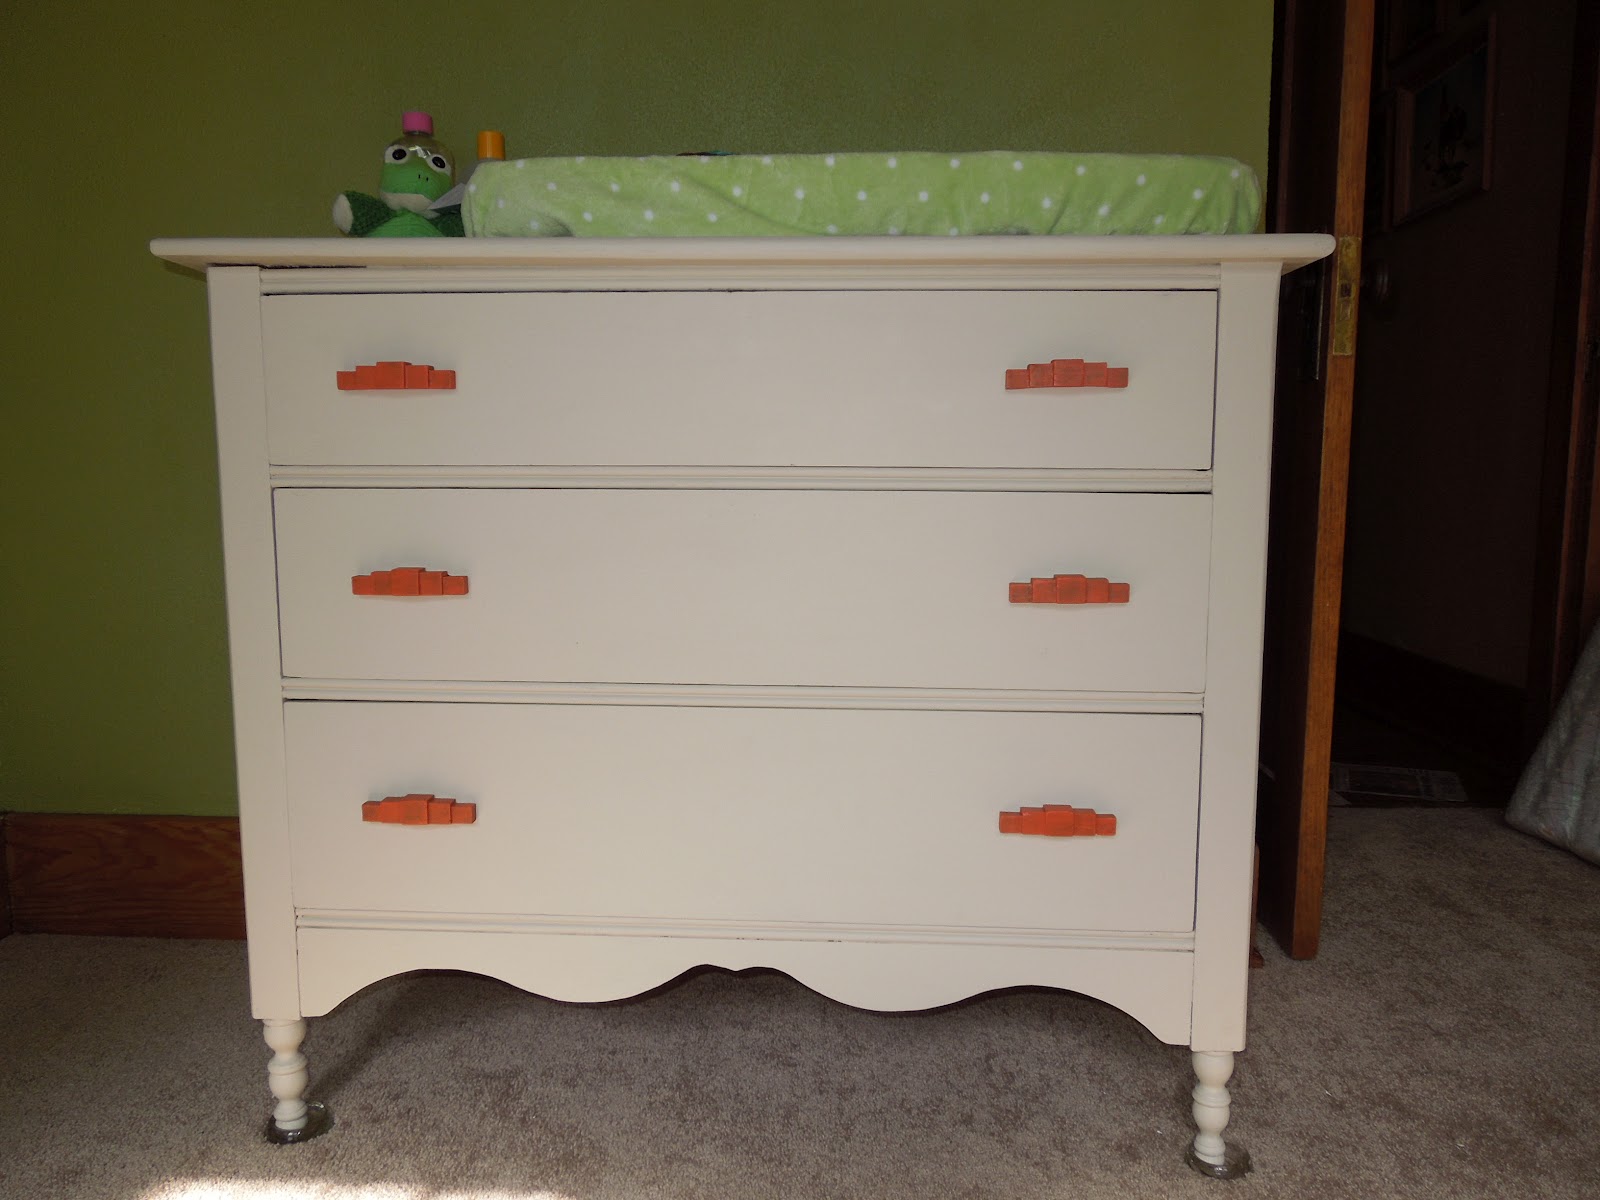
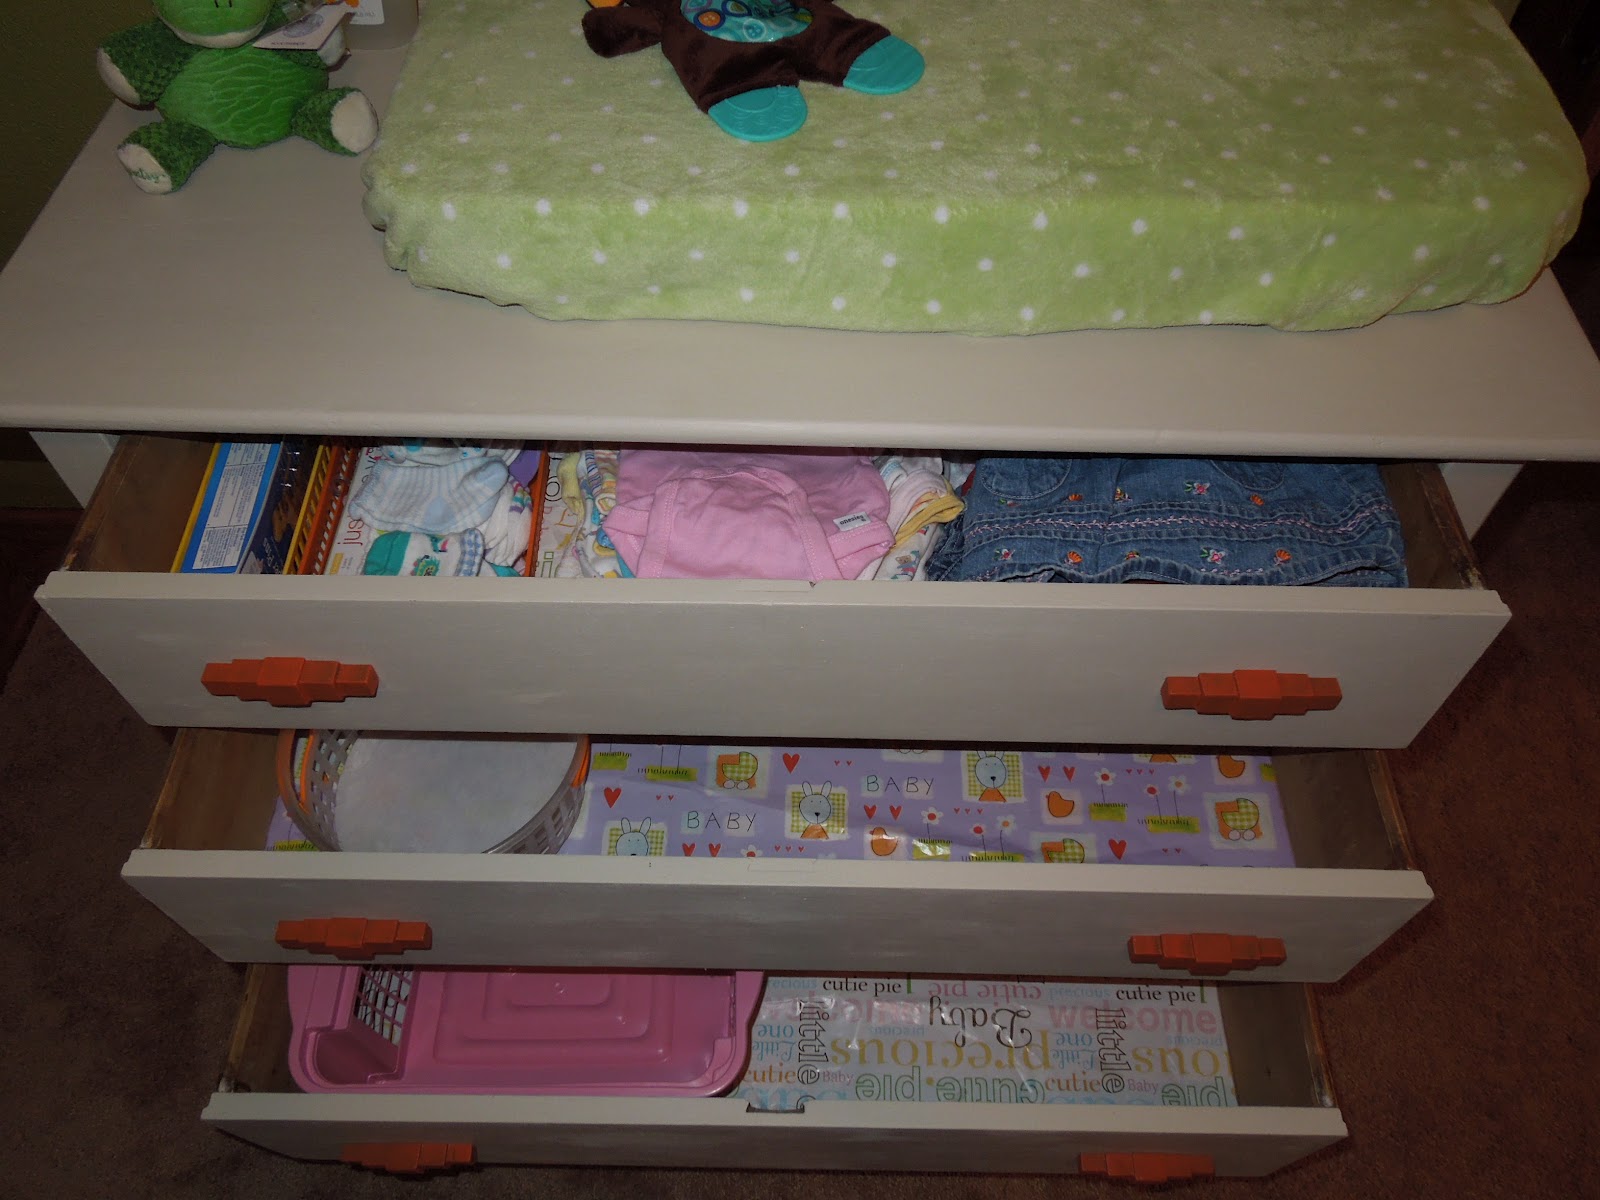
The handles are the best part because instead of going out and buying a set, my grandpa made them. They have a funky art deco look and after the chippy layers of paint were removed a smooth black paint remained. I wanted to somehow give them a Bakelite feel and already had picked up the orange paint at free paint day at our salvage store so the black paint was perfect.

 Well, it helped give them an aged/toned down look anyways, otherwise they would be bright "Jungle Orange". The white paint also came from free paint day and I lined the drawers with paper from the baby shower (everyone makes fun of me for my meticulous package opening but ha! it paid off)

 so the total cost of this project? $0! I guess I did pay .50 for the 4 baskets to help organize the drawers if that counts? and we may have also used up a couple chunks of sand paper.

Saturday, August 4, 2012

Amazing Plaster Washers

Room remodeling goes a lot faster with no putsy plumbing or electrical work. These are the before shots of the nursery (complete with Frankie's stuff still in the middle). I swear I have some of the other side of the room but my photo files are all unorganized after the camera fiasco. They get the point across.


and the closet.


The insulation plugs are all still obvious, paint from 1943 in the closet, slightly newer in the bedroom and the gross mismatched carpet seen here. Definitely NOT a cute or even usable nursery.

The biggest dilemna was the slightly wiggly plaster on the ceiling. The plaster keys had pulled away from the lathing in several spots from moisture (the roof had been in disrepair at least once in the house's lifetime), settling and just because it is 100 years old. My dad's plan was to knock down the loose areas, which included most anything that was at an angle. Ugh, what a mess and a lot of work! There were only a few old and somewhat repaired cracks in those areas plus nothing we replace it with will ever be as good as that 100 year old plaster so I felt it a shame to knock it all down. There had to be SOMETHING easy out there to help us with this problem and with a little Google search I found these glorious objects known as plaster washers.

 Everything I read about them said I wouldn't be able to find them at the hardware store. But surely the Ace down the block has them? With all of these old houses in the neighborhood, it seems like something they should have. Everyone was correct. We got strange looks for asking and one guy had to look them up online to see if they did exist. He said they sounded pretty nifty but they didn't have any. Thank goodness for the internet. A quick trip to Amazon and they were at my doorstep less than a week later.
They supposedly will hold when just screwed to the lathing but since our plaster wasn't ridiculously loose or cracked into tiny sections my dad searched down the studs and screwed most of the washers into those. After about 15 minutes the ceiling was just as secure, if not more so, than it was 100 years ago. As I said, our ceiling was not horrible so I can't vouch for how they would work on super loose plaster but they worked fantastically well here.  For now anyways!!

  
 Here are some in action on the wall in the closet. They went in so fast I left the room to work on another project, came back and my dad had started plastering over them already! 

Some partially plastered washers on the ceiling. 

Whew! Dilemma solved and a lot of extra work and mess avoided!