Tuesday, May 25, 2010

Playing with the Power Washer

Lately we have been brainstorming exterior color ideas mainly because the bank is forcing us since they have our money in escrow. The white with green is OK and probably looked pretty good mid 1990's but yeah, it screams 90's to me. Not to mention they just used plain old exterior paint which obviously was not meant to be used on stucco as it peels off when you look at it sideways.

I knew the stucco was colored underneath though I figured it would be impossible to remove the layers of paint. BUT only half so and it would be pretty nifty to bring back the original color not to mention the fact we wouldn't have to paint it...ever!! I know it needs some patching and the bathroom addition will not be this color but we shall see what I can find to patch and match. In the meantime I will cross my fingers the entire front of the house hasn't been re-stuccoed or something of the sort.


A close up of the evolution of paint colors - the far right is straight stucco. It does look a bit like diarrhea brown in the pictures but it is lighter.

Monday, May 24, 2010

Welcome Cammie!!

This was my distraction this week, well, along with Mario Galaxy but that is another story. She is a bit fast moving so she's hard to photograph but you get the idea.

Cammie picked us out while we were visiting the Cat House and convinced us to take her home.

Boy am I glad she did because now at least somebody else appreciates my fantastically 90's beanbag chair I have had since 4th grade. She has spent quite a bit of time popping up and down trying to capture the beans.

We were worried about her getting along with Otters but she snuck into Frankie's room earlier this week and he caught them canoodling. I believe the reason they look cranky is he snapped this shot, flash and all, around 5:30 am. Or Otters could just be terrified, it is hard to say.

Monday, May 17, 2010

Nifty "New" Shelf

I've been chugging away on the bathroom between work and cleaning up after boys plus I had a cavity filled a few days ago and now 3 teeth down have started throbbing so I'm guessing it is something nerve related. Hopefully it goes away because I cringe at the thought of having to go back and having something more done! I am telling myself it is getting better so I hope I am right.
To distract myself I thought I would do a quick post about the "swinging" shelf I found this weekend.

I have to dig out some of my equally nifty critters to fit on the shelves as those candlesticks aren't doing it for me. It is hanging in the bedroom right now (oddly it matches the curtain colors) but maybe someday it will reside over a buffet in the dining room...with the nifty critters. The mirror on the back reflecting the light fixture and curtains/window make it awkward to photograph.


I did go back to the salvage store and get another towel rack. None had sold! What is wrong with people!? Who wouldn't want a telescoping towel rack in their bathroom!? Especially for $3! Gesh

Thursday, May 6, 2010

Oops, I got distracted...

I tried the tile for about 10 mins and realized none of the tiles were attached together straight or equally spaced (what do I expect for $2.57) so I got annoyed, argued with the tile for a while and then left the room. Fortunately Saturday morning I had found a couple of chairs for $1 at a garage sale which needed some TLC so aha! what a perfect way to take out my frustrations and ignore the tile issue.

The white and brown one I found in the kitchen but the black one was out in the barn/workshop so it had a few more coats of paint on it which were blotchy and drippy. I think the brown one will do with a light sanding but the black paint had to go away on the other.

I have since figured out how to do the tiles without separating every single one but I still haven't attached them to the floor so now I have half stripped chairs and some tile kind of place around the bathroom not to mention the partially finished wood floor. Someday I am planning on finishing a project before starting another....

Thursday, April 29, 2010

At least the first floor isn't smelly anymore


Bart and Bling came for a visit this weekend. Bling spent a lot of time chilling in the basement but Bart claimed his spot on the chest by the window. The dog spent his time trying to smell Bart's rear hence why Bart is up high er, too high for the dog .

Moving on, this is what I smelled whenever I walked in the door. I don't think I need to describe it, the photos speak for themselves.

The first floor bathroom was carpeted!

AND the toilet was leaky. Gross!!

No more carpet equals no more smell. Yay!

No more toilet really means no more smell! Mark, did you turn up your i pod to cover the smell??

Well, after we plugged up the drain to avoid sewer gas there was no more smell. The evolution of the decor is displayed on the wall behind the toilet.

Go Pink! 1970 was a little late for the pink bath craze?? I wonder what original flooring they had.

Our display of supplies - minus the entertainment center in the midst.

Mark is disgruntled about me taking pictures. He would be shaking his fist if he wasn't holding down the board.

The cement board? (It says cement board but the Home Depot guy called it something else, it was sitting in the tile area anyways) is down and it already looks fresher.

Yea, yea, I chose the same tile everyone else seems to choose but I was looking for some generic black and white tile and how can one beat the $2.50 a sq ft tile from Home Depot? The main bathroom will be a little more exciting maybe? But as far as the 1/2 bath goes this sure beats that carpet. So far I just have it sitting loose and I haven't started the adventure of actually attaching it. This will be a test of my true talent and also practice for when it's time to do the real bathroom.

Tuesday, April 27, 2010

My "New" Hall-Mack Towel Ring

I was extremely excited to find this today though I do admit to getting very excited about odd things. I went over to the eco-store to scope out any new inventory of interest and see what I could find for our smelly 1/2 bath. I was looking for a chrome towel ring which might sort of pass off as 50's/60's. I actually had a cheapy one in my hand I was trying to decide on when I spotted a pile of old boxes and alas what was inside but brand new vintage towel rings for $3!

The only disadvantage is I do feel obligated to keep the nifty looking box!


I'll try to do a post of our weekend activities tomorrow?? We shall see. But in the meantime here is a little sneak peek of the action:


Thursday, April 15, 2010

Floor Finishing

OK, I started this post a while ago and have not gotten back to finish it! I have been embarrassed to admit not only am I still working on refinishing the first floor but I am also still only on the first square! No more!
I was definitely procrastinating on finishing the section because A: I would have to decide a color. B. I was afraid I would completely mess it up (umm, anything would look better than before) and C. Me being the only one working on it was a slow process. Mark now feels pretty confident he can help so the next sections will be delegated and hopefully move along a little faster??

Pine is more finicky than Oak so I was informed by the Minwax pamphlet I should use pre-stain.

I know they say to test in a corner, but where? I tested right in the middle because chances are we will have a rug. The test spot blended in anyways so it didn't matter. The brush was ditched as it just smeared both the pre-stain and the stain around on top. I used an old sock for the pre-stain and then a different sock for the stain.


Yay, it's getting finished. Ironically (is it irony? I've been confused about the definition since I heard Mark arguing with Alanis Morisette) I used oil based Golden Oak to add a little brown/red and get rid of the yellow pine raggy basketball court look it had going on.

Previous refinishers (circa 1970?) not only took a good 1/8" off the floor with their sander but they also decided to fill each crack with filler of some sort. I'm going to take a guess this was a very tedious process and all it did was make the cracks wider since the wood still needed to expand and contract. It also left nasty white streaks in between the boards where we had sanded/it had fallen out.

This is where all of those hours of art class finally pay off! I somehow managed to match the wood color though even a generic dark brown color would look better than the bright white.

The floor completely finished but no polyurethane yet.

The first coat of polyurethane came out really splotchy, shiny and gross. At this point I was thinking the floor was going to look worse than before and it made me sad. But I know myself too well and decided to keep on going since I obviously can't stuff this project in the back of my closet unfinished!

The paint brush worked perfectly for the polyurethane. Dad left the brushes and I figured they were special pricey brushes for this project but he informed me yesterday he just picked them up at the dollar store. Four coats of polyurethane and I did not have to pick out a single bristle so note to self: dollar store brushes work better than $15 brushes.

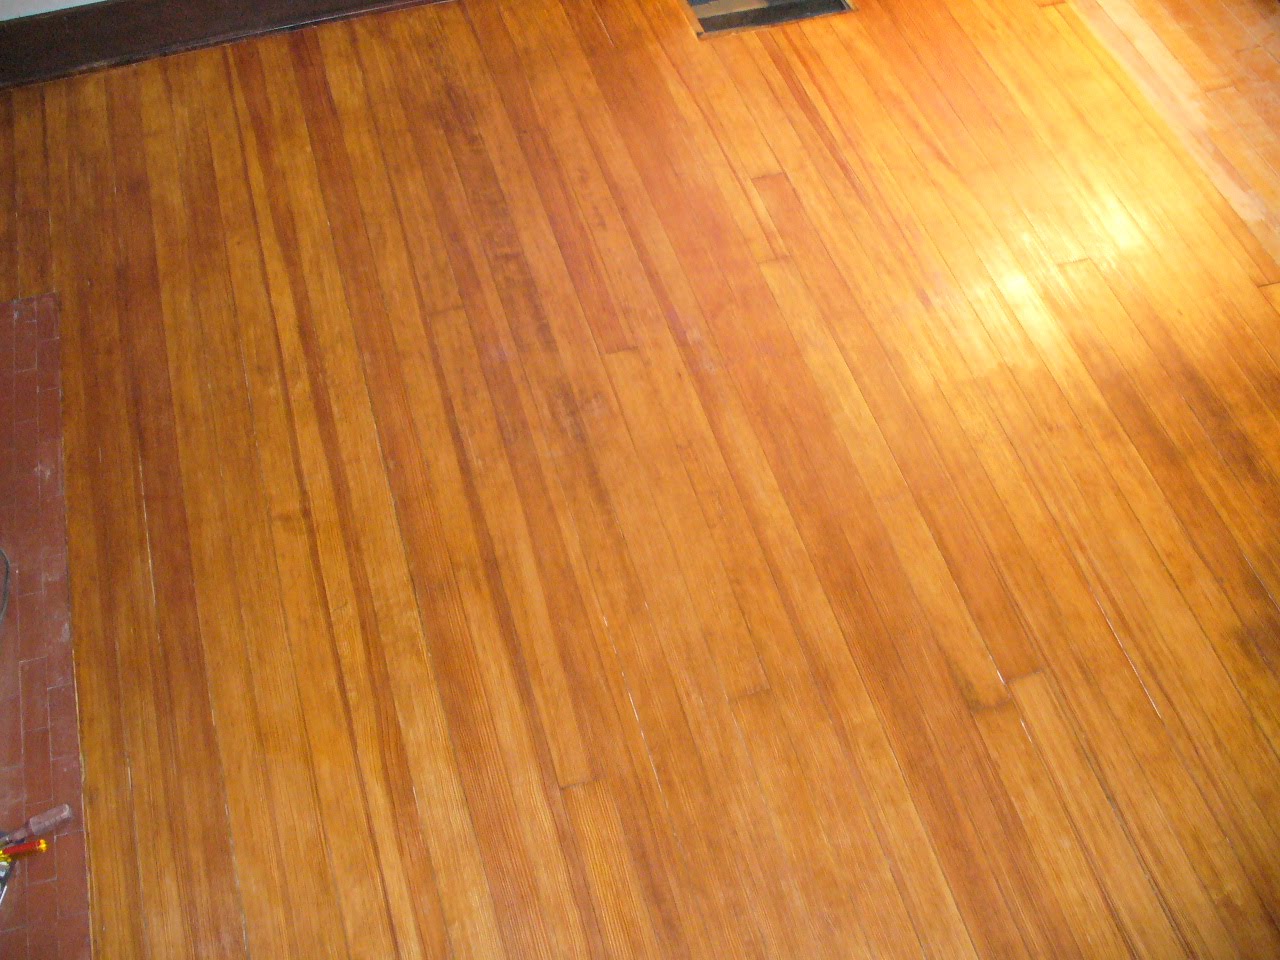
The final coat of polyurethane still wet. I used semi-gloss so it is not this shiny. I tried getting a dried shot but the lighting was bad. The color and finish evened out as I had hoped. My goal was to freshen it up without losing the character the wood had gained over the years. The previous owner's dog left behind a little more character than I would have liked but the floor does look better than before.